
Installing Node-RED on Webfaction
This is slightly counter-intuitive so thought I would share how I went about it. The main issue that caught me out was the standard node app in Webfaction doesn’t work with web sockets, and Node-RED uses web-sockets.
This guide assumes that you are pretty comfortable in the Webfaction control panel and using SSH to access your server. Their documentation is good if you need clarification on how any of these steps work.
-
- Go into the Webfaction control panel and create two new apps.
- A node.js app
- This one is going to run Node-RED and will install Node.js and NPM for us, making it very easy to install Node-RED. Leave port closed to external access.
- A websockets custom app
- This is the one that caught me out, and is needed to proxy web-sockets correctly to the node.js app. Make a note of the port number as we will need it later. Leave port closed to external access.
- A node.js app
- In the Webfaction control panel create a new website.
- Create a HTTP website with your Node-RED domain name and point it to the web-sockets app, not the Node.js app.
- Stop the default Node.js app from starting.
- Access your account with SSH and type
crontab -e - You should see a line restarting the Node.js app every 20 minutes, comment it with a
# - Change directory to your Node.js app
cd ~/webapps/node-redexport PATH=$PWD/bin/:$PATH./bin/stoprm hello-world.js
- Access your account with SSH and type
- Install Node-RED
- Presuming you are already in the Node.js app folder and have set the PATH variable (see above), enter the following command to install Node-RED
npm install -g --unsafe-perm node-red- If you type
node-red -p 12345(where 12345 is the port of the web-sockets application), Node-RED should start up and wait for connections. - If you go to your domain in a web browser (http only at this stage) you should see a working but very insecure Node-RED page, YAY!
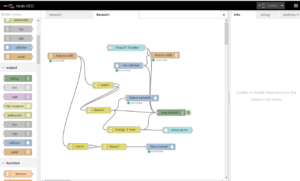
- If you want to test if web-sockets are working try the Creating your first flow tutorial from the Node-RED docs, you should see debug messages in the right hand pane when you hit the inject button.
- Presuming you are already in the Node.js app folder and have set the PATH variable (see above), enter the following command to install Node-RED
- Go into the Webfaction control panel and create two new apps.
Now we have a working application the next post will look at some basic configuration to secure it.